Object Tracking: 2-D Object Tracking using Kalman Filter in Python
In the previous tutorial, we’ve discussed the implementation of the Kalman filter in Python for tracking a moving object in 1-D direction. Now, we’re going to continue our discussion on object tracking, specifically in this part, we’re going to discover 2-D object tracking using the Kalman filter.
As I mentioned already in the previous tutorial, the 1-D Kalman filter concept is a prerequisite for the tutorials related to the object tracking algorithm that you will find in my blogs. So, I suppose that you’ve read it carefully. Otherwise, I strongly recommend reading it first before continuing this one. So that you can follow this guide easily.
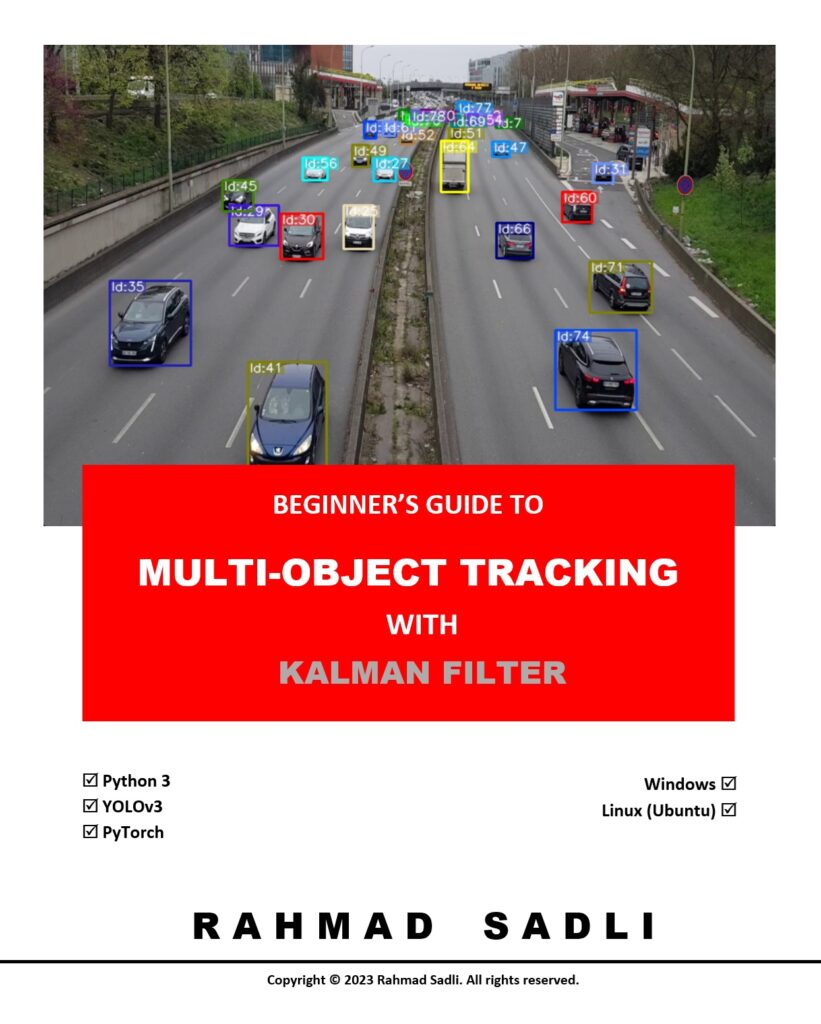
Exciting news, everyone! I’m absolutely thrilled to announce the completion of my book:
Beginner’s Guide to Multi-Object Tracking with Kalman Filter
Get 25% OFF!
Use coupon code: MIJY159IMW during checkout
Don’t miss out on the chance to become a genuine expert in this field. Grab this practical book now and embark on your journey to mastery!
State transition matrix A and control matrix B
Remember, in 1-D Kalman Filter, we consider that both state and velocity are in one-direction only. Based on Kinematic equation, the relation between the position  and velocity
  can be written as the following:
(1) 
Then we can write eq.(1) in the form of matrix multiplication as follows:
(2) 
Now, we’re going to focus on 2-D Kalman Filter. The equations of 2-D Kalman Filter whose position and velocity must be considered in 2-dimensional direction, the – and  – directions, can be created by modifying the 1-D Kalman Filter equations. Meaning that instead of considering only for the position and velocity in one direction, let’s say the -direction, we need to take into account the position and velocity in the -direction as well.
The state in time  can be predicted by the previous state in time
  . Let and be the positions in the – and -directions, respectively, and also let
  and
and  be the velocities in – and -directions, respectively. Then the 2-D Kinematic equation for state
  can be written as:
(3) 
We can write eq.(3) into the form of matrix multiplication as follows:
(4) 
The eq.(4) can be simplified as follows:
(5) 
Where is the current state,  is the previous state, and
  is a vector of the previous acceleration in – and -directions.
So, we the matrices A and B as follows:
(6) 
(7) 
Notice: Pay attention to the notation: and  , they are two different things. Where the (“x” in bold letter) is the state at time that composes of the positions and
  and the velocities
  and
and  at time .
Transformation matrix H
The measurement model for 2-D Kalman filter is the same as the 1-D Kalman filter model:
(8) 
In deriving the observation model, we assume that we’re only measuring the position but not the velocity. Whereas, there are cases where the velocity must be taken into account to incorporate Doppler’s effect, for example, airplane and satellite tracking systems.
We’re now considering the particular case where the velocity will not be considered in the measurement process. So, we can write the measurement model as follows:
(9) 
So, we have the transformation matrix  as:
as:
(10) 
Process noise covariance matrix Q
The process noise covariance matrix  for 2-D Kalman filter can be written as:
(11) ![\begin{equation*} \begin{matrix} \quad\\ \textbf{Q} = \quad\\ \end{matrix} \begin{matrix}\quad\\ x \\ y \\ \dot x \\ \dot y \\ \end{matrix} \begin{array}{c} \begin{matrix}x \mspace{27mu} & y \mspace{27mu} & \dot x \mspace{27mu} & \dot y \end{matrix} \\\left[\ \begin{matrix} \sigma^2_x & 0 & \sigma_x \sigma_ {\dot x} & 0 \\ 0 & \sigma^2_y & 0 & \sigma_y \sigma_ {\dot y} \\ \sigma_ {\dot x} \sigma_x & 0 & \sigma^2_{\dot x} & 0 \\ 0 & \sigma_ {\dot y} \sigma_y & 0 & \sigma^2_{\dot y} \\ \end{matrix}\ \right] \end{array} \end{equation*}](https://machinelearningspace.com/wp-content/ql-cache/quicklatex.com-bf70d8f28d4c57b3bb2b09ff6fd4a7db_l3.png "Rendered by QuickLaTeX.com")
By using the same philosophy as what we’ve discussed earlier in my previous tutorial for 1-D Kalman filter, we can rewrite the process noise covariance matrix for 2-D Kalman filter as:
(12) 
Where the  is the magnitude of the standard deviation of the acceleration that is basically the process noise effecting on the process noise covariance matrix.
Measurement noise covariance matrix R
In 2-D Kalman filter, we suppose that the measurement positions and are both independent, so we can ignore any interaction between them so that the covariance and is 0. We look at only the variance in the and the variance in the .
Then, the measurement noise covariance  can be written as follows:
(13) ![\begin{equation*} \begin{matrix} \quad\\ \textbf{R} = \quad\\ \end{matrix} \begin{matrix}\quad\\ x \\ y \\\end{matrix} \begin{array}{c} \begin{matrix}x \mspace{27mu} & y \end{matrix} \\\left[\ \begin{matrix} \sigma^2_x & 0 \\0 & \sigma^2_y \\ \end{matrix}\ \right] \end{array} \end{equation*}](https://machinelearningspace.com/wp-content/ql-cache/quicklatex.com-4e5ad453b83e7faffbe1fb33520e0324_l3.png "Rendered by QuickLaTeX.com")
Great! We have discussed the essential concepts of 2-D Kalman filter, and now it’s time to implement it in Python. Let’s do it!
Python Implementation
Now we’re ready to implement 2-D Kalman Filter in Python. So, let’s do it..
This project has three files, namely: KalmanFilter.py, Detector.py, and objTracking.py.
KalmanFilter.py
Let’s look at first the KalmanFilter.py. This file contains one class called KalmanFilter consisting of three functions, __init__(), predict(), and update().
We’re going to discuss these functions one by one.
Function Initialization()
The function __init__() is used to initialize the class parameters. It has six parameters, dt, u_x, u_y, std_acc, x_std_meas and y_std_meas. The dt is the sampling time or the time for 1 cycle used to estimate the state, u_x and u_y are the accelerations in the – and -directions, respectively. The std_acc is the process noise magnitude, x_std_meas and x_std_meas are the standard deviations of the measurement in the – and -directions, respectively.
class KalmanFilter(object):
    def __init__(self, dt, u_x,u_y, std_acc, x_std_meas, y_std_meas):
        """
        :param dt: sampling time (time for 1 cycle)
        :param u_x: acceleration in x-direction
        :param u_y: acceleration in y-direction
        :param std_acc: process noise magnitude
        :param x_std_meas: standard deviation of the measurement in x-direction
        :param y_std_meas: standard deviation of the measurement in y-direction
        """

        # Define sampling time
        self.dt = dt

        # Define the  control input variables
        self.u = np.matrix([[u_x],[u_y]])

        # Intial State
        self.x = np.matrix([[0], [0], [0], [0]])

        # Define the State Transition Matrix A
        self.A = np.matrix([[1, 0, self.dt, 0],
                            [0, 1, 0, self.dt],
                            [0, 0, 1, 0],
                            [0, 0, 0, 1]])

        # Define the Control Input Matrix B
        self.B = np.matrix([[(self.dt**2)/2, 0],
                            [0, (self.dt**2)/2],
                            [self.dt,0],
                            [0,self.dt]])

        # Define Measurement Mapping Matrix
        self.H = np.matrix([[1, 0, 0, 0],
                            [0, 1, 0, 0]])

        #Initial Process Noise Covariance
        self.Q = np.matrix([[(self.dt**4)/4, 0, (self.dt**3)/2, 0],
                            [0, (self.dt**4)/4, 0, (self.dt**3)/2],
                            [(self.dt**3)/2, 0, self.dt**2, 0],
                            [0, (self.dt**3)/2, 0, self.dt**2]]) * std_acc**2

        #Initial Measurement Noise Covariance
        self.R = np.matrix([[x_std_meas**2,0],
                           [0, y_std_meas**2]])

        #Initial Covariance Matrix
        self.P = np.eye(self.A.shape[1])
We define the matrices A, B, and H as exactly in eq.(6), eq.(7), and (10), respectively. We define also the matrices Q and R as in eq.(12) and eq.(13) , respectively.
The covariance matrix  can be initialized as an identity matrix whose shape is the same as the shape of the matrix A.
        #Initial Covariance Matrix
        self.P = np.eye(self.A.shape[1])
Function predict()
The functionpredict() does the prediction of the state estimate  and the error covariance
  . This task also called the time update process because it projects forward the current state to the next time step. We use the same equation for the time update process as we discussed earlier in our last tutorial. Please refer to Eq.(9) and Eq.(10) of the last tutorial.
    def predict(self):
        # Refer to :Eq.(9) and Eq.(10)  in https://machinelearningspace.com/object-tracking-simple-implementation-of-kalman-filter-in-python/?preview_id=1364&preview_nonce=52f6f1262e&preview=true&_thumbnail_id=1795

        # Update time state
        #x_k =Ax_(k-1) + Bu_(k-1)     Eq.(9)
        self.x = np.dot(self.A, self.x) + np.dot(self.B, self.u)

        # Calculate error covariance
        # P= A*P*A' + Q               Eq.(10)
        self.P = np.dot(np.dot(self.A, self.P), self.A.T) + self.Q
        return self.x[0:2]
Function update()
During the update stage, we compute the Kalman gain  , then update the predicted state estimate
  and predicted error covariance
  . Please refer to Eq.(11), Eq.(12) and Eq.(13) of the last tutorial.
The following is our code of the function update() that returns the updated positions of the and .
    def update(self, z):

        # Refer to :Eq.(11), Eq.(12) and Eq.(13)  in https://machinelearningspace.com/object-tracking-simple-implementation-of-kalman-filter-in-python/?preview_id=1364&preview_nonce=52f6f1262e&preview=true&_thumbnail_id=1795
        # S = H*P*H'+R
        S = np.dot(self.H, np.dot(self.P, self.H.T)) + self.R

        # Calculate the Kalman Gain
        # K = P * H'* inv(H*P*H'+R)
        K = np.dot(np.dot(self.P, self.H.T), np.linalg.inv(S))  #Eq.(11)

        self.x = np.round(self.x + np.dot(K, (z - np.dot(self.H, self.x))))   #Eq.(12)

        I = np.eye(self.H.shape[1])

        # Update error covariance matrix
        self.P = (I - (K * self.H)) * self.P   #Eq.(13)
        return self.x[0:2]
Now, we’re going to look at the Detector.py
Detector.py
This file plays a rule as an object detector. Since we’re detecting a simple object like a moving circle, we no need an advance object detector using machine learning. It’s enough to do by only using classical image processing algorithms.
# Import python libraries
import numpy as np
import cv2

def detect(frame,debugMode):
    # Convert frame from BGR to GRAY
    gray = cv2.cvtColor(frame, cv2.COLOR_BGR2GRAY)

    if (debugMode):
        cv2.imshow('gray', gray)

    # Edge detection using Canny function
    img_edges = cv2.Canny(gray,  50, 190, 3)
    if (debugMode):
        cv2.imshow('img_edges', img_edges)

    # Convert to black and white image
    ret, img_thresh = cv2.threshold(img_edges, 254, 255,cv2.THRESH_BINARY)
    if (debugMode):
        cv2.imshow('img_thresh', img_thresh)

    # Find contours
    contours, _ = cv2.findContours(img_thresh, cv2.RETR_EXTERNAL, cv2.CHAIN_APPROX_SIMPLE)

    # Set the accepted minimum & maximum radius of a detected object
    min_radius_thresh= 3
    max_radius_thresh= 30

    centers=[]
    for c in contours:
        # ref: https://docs.opencv.org/trunk/dd/d49/tutorial_py_contour_features.html
        (x, y), radius = cv2.minEnclosingCircle(c)
        radius = int(radius)

        #Take only the valid circles
        if (radius > min_radius_thresh) and (radius < max_radius_thresh):
            centers.append(np.array([[x], [y]]))
    cv2.imshow('contours', img_thresh)
    return centers
The Detector.py only contains one function, that is the detect(). It has two arguments, theframe and debugMode. When calling this function, it will convert a video frame passed through the frame argument to a Grayscale image using cv2.cvtColor(). After that, it detects the edge of the object in the image using Canny edge detection.
Then, using cv2.threshold() function, the image is converted to a binary image. A threshold value is applied. If a pixel value is greater than a threshold value, it is assigned a specific value (e.g. 255, white), else it will be converted to 0, or black.
From the binary image, then we find the contour representing an object in the image using cv2.findContours().
Finally, in every detected contour, we find the circumcircle of an object using the function cv2.minEnclosingCircle(). The circle candidate must meet the minimum and maximum radius values.
Since this function is purposed to detected multiple objects, it returns the centers of the detected objects. Meaning that we can use this function not only for detecting one object but also for detecting multi-object.
Every processing step can be displayed by setting the debugMode=1 when calling the function detect().
Now we’re going to discuss the file objTracking.py.
objTracking.py
This is the main file of this project that we’ll execute to track an object. At the beginning of this file, we import function detect() from the file Detector.py, and class KalmanFilter from the file KalmanFilter.py.
In the function main(), we create the object of the classKalmanFilter as follows:
    #Create KalmanFilter object KF
    #KalmanFilter(dt, u_x, u_y, std_acc, x_std_meas, y_std_meas)
    KF = KalmanFilter(0.1, 1, 1, 1, 0.1,0.1)
We set the parameters values as: dt = 0.1 , u_x = 1, u_y=1, std_acc = 1, y_std_meas =1. You can try to set other values and observed the performance.
After that, we create the object of the cv2.VideoCapture():
    # Create opencv video capture object
    VideoCap = cv2.VideoCapture('video/randomball.avi')
Since the video is read in RGB format, it is necessary to convert it to Grayscale format. For this task, we perform it in the file Detector.py as we discussed already earlier.
In the while loop and in every looping, we read a video frame and detect the center of an object in that frame. If the center is detected, then call the Kalman filter prediction function KF.predict() and the Kalman filter updating function KF.upadate() to update the position of the object given a new measurement value (a detected center) and a prediction position.
The rest of the cod is to draw a circle and two rectangles. The circle is for the measured position and the rectangles are for the predicted and updated positions.
Here is the complete code for objTracking.py.
import cv2
from Detector import detect
from KalmanFilter import KalmanFilter

def main():

    # Create opencv video capture object
    VideoCap = cv2.VideoCapture('video/randomball.avi')

    #Variable used to control the speed of reading the video
    ControlSpeedVar = 100  #Lowest: 1 - Highest:100

    HiSpeed = 100

    #Create KalmanFilter object KF
    #KalmanFilter(dt, u_x, u_y, std_acc, x_std_meas, y_std_meas)

    KF = KalmanFilter(0.1, 1, 1, 1, 0.1,0.1)

    debugMode=1

    while(True):
        # Read frame
        ret, frame = VideoCap.read()

        # Detect object
        centers = detect(frame,debugMode)

        # If centroids are detected then track them
        if (len(centers) > 0):

            # Draw the detected circle
            cv2.circle(frame, (int(centers[0][0]), int(centers[0][1])), 10, (0, 191, 255), 2)

            # Predict
            (x, y) = KF.predict()
            # Draw a rectangle as the predicted object position
            cv2.rectangle(frame, (int(x - 15), int(y - 15)), (int(x + 15), int(y + 15)), (255, 0, 0), 2)

            # Update
            (x1, y1) = KF.update(centers[0])

            # Draw a rectangle as the estimated object position
            cv2.rectangle(frame, (int(x1 - 15), int(y1 - 15)), (int(x1 + 15), int(y1 + 15)), (0, 0, 255), 2)

            cv2.putText(frame, "Estimated Position", (int(x1 + 15), int(y1 + 10)), 0, 0.5, (0, 0, 255), 2)
            cv2.putText(frame, "Predicted Position", (int(x + 15), int(y)), 0, 0.5, (255, 0, 0), 2)
            cv2.putText(frame, "Measured Position", (int(centers[0][0] + 15), int(centers[0][1] - 15)), 0, 0.5, (0,191,255), 2)

        cv2.imshow('image', frame)

        if cv2.waitKey(2) & 0xFF == ord('q'):
            VideoCap.release()
            cv2.destroyAllWindows()
            break

        cv2.waitKey(HiSpeed-ControlSpeedVar+1)


if __name__ == "__main__":
    # execute main
    main()
To run this program, I provide a video that you can download it here.
The complete code of this project can be found in the link below:
https://github.com/RahmadSadli/2-D-Kalman-Filter
This is the end of this tutorial and see you in the next tutorial.
Recent posts:
- A Comprehensive Guide to Gradient Descent
- Object Tracking: Simple Implementation of Kalman
- Sentiment Analysis Using Keras Embedding Layer in TensorFlow 2.0
- The beginner’s guide to implementing YOLOv3 in TensorFlow 2.0
What others say
Hello
i think there is a error here:
self.B = np.matrix([[(self.dt**2)/2, 0],
[(self.dt**2)/2,0], <——-
[self.dt,0],
[0,self.dt]])
this is ok no ?
self.B = np.matrix([[(self.dt**2)/2, 0],
[0, (self.dt**2)/2],
[self.dt,0],
[0,self.dt]])
Laurent
Hi, Exactly..as in equation 7. I didn’t realize that..
Thanks
Thanks for the amazing blog!
I have two questions:
1- 2- I’m trying to track a car in a street. the data would be a video with the car already detected by a model. I want to track that car but from my understanding, I have to supply the filter with a measurement first.
So would using one of OpenCV trackers make sense? (instead of the Detector.py class)
2- What is the approach to take if we want to estimate the speed for this example?
Lastly, I wanted to say that I watched so many videos and was trying to get my head around it, and even though I’m still not 100% sure that I understand all the parts but the steps are much more clearer.
Thanks a lot 🙂
Hi, I Get this error when I try to run the program someone can tell me what the problem?
Thanks to the helpers. 🙂
This is the error that python give me
cv2.rectangle(frame, (x – 15, y – 15), (x + 15, y + 15), (255, 0, 0), 2)
cv2.error: OpenCV(4.5.3) :-1: error: (-5:Bad argument) in function ‘rectangle’
> Overload resolution failed:
> – Can’t parse ‘pt1’. Sequence item with index 0 has a wrong type
> – Can’t parse ‘pt1’. Sequence item with index 0 has a wrong type
> – Can’t parse ‘rec’. Expected sequence length 4, got 2
> – Can’t parse ‘rec’. Expected sequence length 4, got 2
Hi, Downgrade your opencv to version 4.2
==> pip install opencv-python==4.2.0.34
Hope this will solve the problem
Thanks-a-mundo for the blog article.Much thanks again. Fantastic.
Hi,
I got this small error:
cv2.error: OpenCV(4.5.4) : -1 : error: (-5:Bad argument) in function ‘rectangle’
Solution: using int() conversion on coordinates before passing to ‘rectangle’ or ‘circle’.
Tested on:
MacOS Big Sur
Python 3.7.4
OpenCV 4.5.4
Great tutorial!
Hi, Downgrade your opencv to version 4.2
==> pip install opencv-python==4.2.0.34
Hope this will solve the problem
Any link for object tracking in 3D?
Is the update correct when you compute S ? Matrix product is not commutative, so when you have (H*P*H’ + R)^-1 I expect you to first compute np.dot(np.dot(H,P), H’) not np.dot(H, np.dot(P,H’)). Thank you
Hi,
The update is correct.
Since P is a square matrix size of 4×4, then (HP)H’ = H(PH’).
Thanks for the tutorial
Thanks
self.x= np.dot(self.A, self.x) + np.dot(self.B, self.u)
ValueError: shapes (4,2) and (1,2) not aligned: 2 (dim 1) != 1 (dim 0)
Hi, this code has been tested and it’s working fine with this setting:
Requirements:
– Python 3.7
– opencv 4.2
Create your conda environment:
– conda create -n your_ENV python=3.7
Install these two libraries:
– pip install matplotlib
– pip install opencv-python==4.2.0.34
Hope this resolves your prob.